
How to Choose the Best Ultrasonic Disperser for Your Needs?

Choosing an Ultrasonic Disperser is less about buying the most powerful model and more about matching the instrument to your material and workflow. A unit that works well for a small aqueous sample may struggle with a viscous formulation or a larger batch. Start by defining your sample volume, expected viscosity, and dispersion goal. Are you breaking up soft agglomerates, reducing particle size, or preparing a stable emulsion? These differences affect the probe, operating settings, and processing time you may need.

Look closely at adjustable amplitude, rated power, probe diameter, and duty cycle. A narrow probe can suit small vessels, while larger volumes may need a broader probe or a different setup. Check whether the instrument supports pulsed operation and whether cooling is practical; repeated runs can warm a sample more than expected. Vessel shape and immersion depth matter, too. Keep the probe clear of the vessel walls and bottom, following the manufacturer’s guidance. Small details matter.

For a sound comparison, review the technical specifications and test representative samples when possible. Record the settings, temperature changes, and visible results; appearance alone does not confirm particle size or long-term stability. Ask about replacement probes, maintenance, training, and service support before purchasing. A higher power rating is not automatically a better fit. There may not be one ideal setting, and early trials can require adjustment. That is normal, though it can be frustrating. This guide explains how to weigh these practical factors and choose an Ultrasonic Disperser that fits your application, available space, and day-to-day operating needs.
How to Choose the Best Ultrasonic Disperser for Your Needs?

Understanding How Ultrasonic Dispersers Work

How to Choose the Best Ultrasonic Disperser for Your Needs?

Understanding How Ultrasonic Dispersers Work

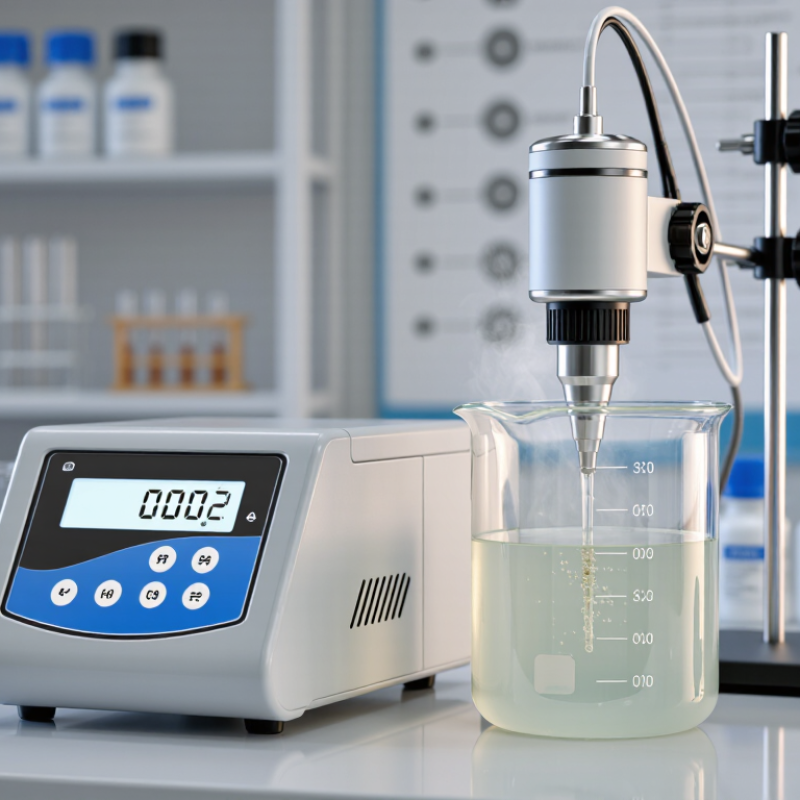
An ultrasonic disperser converts electrical energy into rapid mechanical vibrations. A probe transfers these vibrations directly into liquid, creating alternating pressure zones. Tiny bubbles form and collapse in a process called cavitation. Their collapse produces local shear forces that break apart agglomerates and help distribute particles. Suslick’s review in Science (1990) describes cavitation hot spots reaching about 5,000 K and 1,000 atmospheres. These are brief, microscopic conditions, not the temperature or pressure of the whole sample.

That distinction matters when choosing equipment. Probe systems deliver energy directly and often suit viscous samples or focused processing. Ultrasonic baths act indirectly, which can be gentler but less consistent for demanding dispersion work. Match the probe, power, and vessel to your sample volume and viscosity. Watch for foaming, heating, and material sticking to the vessel walls. More power is not always better. Results can vary with sample depth and probe position, so test your actual formulation.

Tips: Start at lower amplitude and use short pulses. Check the sample temperature between runs. Keep the probe immersed without letting it touch the vessel. Record settings and particle-size results; small setup differences can change the outcome. There is no perfect setting, and cavitation models cannot predict every slurry.

How to Choose the Best Ultrasonic Disperser for Your Needs? - Understanding How Ultrasonic Dispersers Work
Selection factor Probe-type ultrasonic disperser Ultrasonic bath What to consider
How it works A vibrating probe, or sonotrode, transfers acoustic energy directly into the liquid. Cavitation—formation and collapse of bubbles—creates strong local shear that can disperse particles and droplets. Transducers vibrate the bath liquid, which transfers ultrasound indirectly through the sample vessel. Energy reaching the sample is generally less concentrated than with a probe. Choose direct probe treatment for intensive, targeted processing; consider a bath for gentler, indirect treatment of multiple closed vessels.
Typical use Deagglomeration, emulsification, particle-size reduction, cell disruption, and other applications needing substantial energy input. Cleaning, degassing, and lower-intensity sonication of several samples or vessels at once. Match the equipment to the required result; a bath may not provide sufficient intensity for demanding dispersion work.
Sample volume and scale Commonly used for samples from a few millilitres to several litres, depending on probe size, power, vessel geometry, and process requirements. Capacity is determined by tank dimensions. The volume of the sample itself depends on the vessels placed in the bath and the bath’s usable space. Check the manufacturer’s stated operating range and validate performance at the intended batch size; scaling up can change energy distribution and cooling needs.
Frequency Many high-power probe systems operate near 20 kHz; other frequencies are available for particular applications. Cleaning and laboratory baths commonly operate in the tens-of-kilohertz range, often around 35–45 kHz; specifications vary by unit. Frequency alone does not determine performance. Compare the complete system and test it with the actual material.
Power and intensity Power ratings vary widely across laboratory and production systems. A probe delivers energy into a relatively small area, so local intensity can be high. Power is distributed through the bath and affected by tank loading, liquid level, vessel position, and sample-vessel material. Do not compare wattage alone. Ask for delivered-power information or application data, and confirm results using a representative sample.
Temperature management Probe sonication can heat samples quickly. Pulsed operation, an ice bath, or active cooling may be needed for temperature-sensitive materials. The bath and samples can warm during operation; some baths provide temperature control, but cooling capacity varies. Set a temperature limit and monitor the sample itself, rather than relying only on the bath or instrument display.
Sample contact and contamination The probe contacts the sample directly and can introduce wear particles over time. Probe material, condition, and cleaning procedures matter. Samples can remain in closed containers, reducing direct equipment contact, provided the vessels are suitable and positioned correctly. For sensitive or contamination-critical work, assess wetted materials, cleaning validation, and whether indirect treatment meets process requirements.
Process control Look for adjustable amplitude, pulse mode, timer, and temperature monitoring. These controls help make processing more repeatable. Check for adjustable power, timer, temperature control, and degassing functions where relevant. Record the settings and sample conditions used in successful trials; nominal settings alone may not transfer between instruments.
Practical limitations Requires suitable probe immersion and positioning; high local intensity can cause heating, foaming, or splashing if process conditions are not controlled. Treatment can be less uniform or less intense, and performance may vary with vessel placement, bath loading, and maintenance. Assess noise, ventilation, sample containment, operator safety, cleaning, and maintenance before purchase.
Best fit Choose when direct, relatively high-intensity energy input and control over a single sample are priorities. Choose when indirect treatment, simpler handling, or simultaneous treatment of several suitable vessels is more important than maximum dispersion intensity. Before selecting a system, run a trial using the real formulation, target batch size, required processing time, and acceptable temperature range.

Note: Operating ranges and performance depend on the instrument design, probe or bath configuration, sample properties, vessel, and process conditions. Confirm specifications with the equipment supplier and validate them for the intended application.

Identifying Your Sample and Processing Requirements

Choosing an ultrasonic disperser starts with the sample, not the instrument’s advertised power. Is it a thin liquid, a viscous paste, or a suspension with gritty particles? Record the volume, solids content, and any sensitivity to heat, foam, or contamination. These details affect probe choice, vessel size, and cooling needs. Small batches may behave differently from larger ones. Keep a little sample for a trial. It can reveal problems early.

Next, define what successful processing means. You may need fewer visible clumps, a narrower particle-size range, or a stable mixture that does not quickly separate. Match the disperser’s working range to your batch size, and check whether it allows pulse operation and temperature monitoring. During a test, note the starting temperature, processing time, and appearance afterward. A simple test can expose a mismatch. Still, the first test may not settle it; samples can respond unevenly, and visual clarity alone may be misleading. If results matter, use a consistent measurement method and repeat the trial before choosing a final setup.

Comparing Power, Frequency, and Probe Options

When comparing ultrasonic dispersers, separate rated power from energy that actually reaches the sample. A 500-watt unit may struggle with a viscous slurry if its probe is too small or the batch is too large. Ask for delivered power or calorimetric data, then compare energy per millilitre under similar conditions. Keep a small test batch. Watch its temperature, too.

Frequency changes cavitation behavior, but it does not predict results alone. Many probe systems operate near 20 kHz; higher frequencies can produce different bubble activity and may suit delicate dispersions. Suslick’s review in Science describes cavitation hotspots reaching roughly 5,000 K and 1,000 atmospheres during bubble collapse. These are microscopic, transient conditions, not the temperature or pressure of the whole vessel. That distinction matters.

Choose probe diameter and material for the vessel, sample volume, and abrasion risk. A narrow probe concentrates energy in a smaller zone; a wider one can treat more volume, but may need greater power. Check immersion depth and clearance from the vessel wall. A probe touching glass can damage either surface. A neat specification sheet can still mislead. Test your actual formulation, measure particle-size change, and note heat buildup across repeated runs. I would not select by watts alone. (Suslick, “Sonochemistry,” Science, 1990.)

Matching Disperser Capacity to Your Workflow

Matching disperser capacity to your workflow starts with the batch, not the largest number on a specification sheet. Estimate the volume you process in one run, then consider how often batches repeat. A 500-milliliter sample used occasionally has different needs from several 10-liter batches each day. Check the recommended working-volume range, since a vessel that is too small or too large can make circulation uneven. Viscosity and solids content matter, too. Thick mixtures may need more power or longer processing, while delicate samples can heat quickly. Watch the temperature. A neat spreadsheet can still mislead if it ignores these practical details.

Tips: Record batch volume, processing time, and temperature during a trial. Leave room for future growth, but avoid buying capacity you rarely use. Ask how the unit handles continuous operation.

Match the disperser’s duty cycle to your actual schedule. If your workflow includes repeated runs, confirm the equipment can operate for the required periods without frequent cooling breaks. Probe size and vessel shape also affect results; keep the probe properly immersed and allow space for material to circulate. When scaling up, do not assume that doubling the batch means doubling the processing time. Test a representative sample and compare consistency, temperature rise, and output. Small differences between batches may remain, so document settings and adjust them carefully.

Match Ultrasonic Disperser Capacity to Batch Size

Vessel capacities are rounded to common planning sizes using a 70% working-fill assumption. This is a sizing guide, not a universal equipment specification: confirm vessel fill limits, probe requirements, material properties, and processing time with the equipment supplier, then validate with a trial.

Assessing Safety, Maintenance, and Operating Costs

Safety deserves attention before comparing output power. Check whether the disperser has a secure probe mount, an emergency stop, and protection against overheating. A loose probe can vibrate, damage a vessel, or create unpredictable splashing. Noise matters, too. If operators work nearby, ask about sound levels and whether an acoustic enclosure is available. Keep the instrument on a stable bench, and leave enough room for ventilation. For temperature-sensitive samples, use a compatible cooling bath and monitor the liquid temperature; ultrasonic energy can warm samples faster than expected.

Maintenance affects both reliability and cost. Ask how often the probe needs inspection, how to replace worn tips, and whether routine cleaning requires special tools. Small cracks or surface wear can reduce performance, but they may be easy to overlook during a busy shift. One detail is easy to miss: cleaning access around the probe holder matters. A difficult design can encourage rushed cleanup. Operating costs include more than electricity. Estimate consumables, replacement probes, cooling water, service visits, and downtime during repairs. A lower purchase price may not remain lower after several years of use. Compare these expenses using your expected batch size and weekly run time, not a best-case estimate. Those estimates will still be imperfect; actual wear depends on the sample and operating habits.

Article Source:

We will help turn your vision into reality

Contact Us